The Foundation: Understanding Swiss Meringue Buttercream
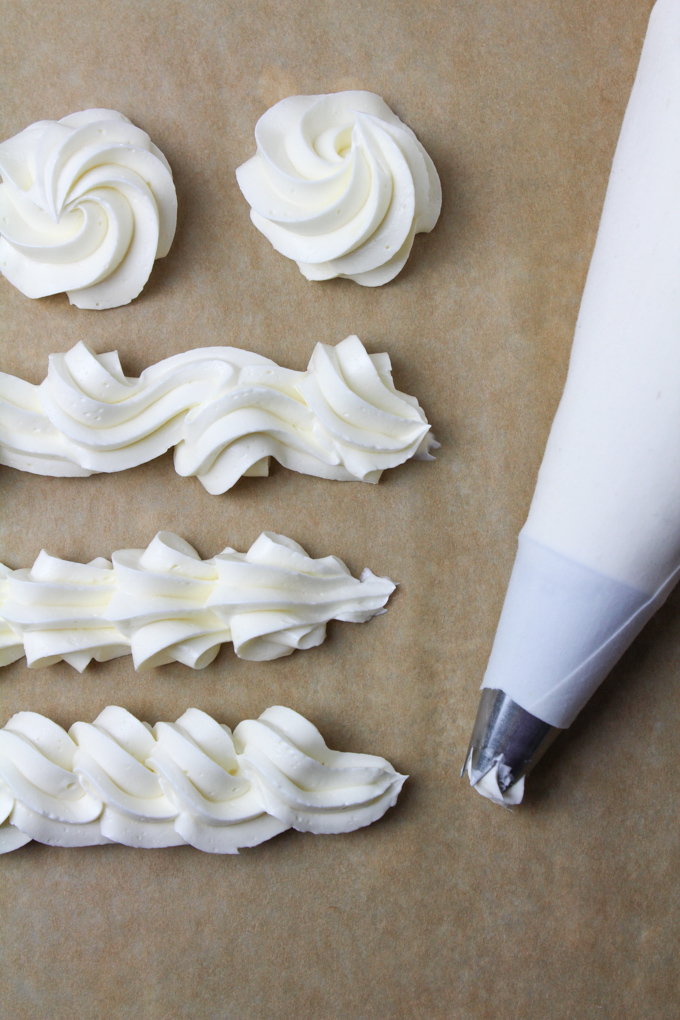
For many bakers, the mention of Swiss Meringue Buttercream (SMB) conjures images of luxurious, silky-smooth frosting, perfectly stable for piping intricate designs or creating smooth, elegant cake coverings. Unlike its American counterpart, SMB is renowned for its less sweet, incredibly light, and almost ethereal texture that melts delightfully in your mouth. But achieving this dreamy consistency isn't always straightforward. The secret, more often than not, lies not just in the ingredients, but in mastering one crucial element: temperature control. Every stage of making SMB, from warming egg whites to incorporating butter and even adding flavorings, is deeply sensitive to temperature fluctuations. Ignore these vital cues, and you might find yourself with a soupy mess or a chunky, curdled disaster instead of the perfect SMB.
In this comprehensive guide, we'll demystify the art of temperature management in Swiss Meringue Buttercream, providing you with essential tips and insights to ensure your next batch is nothing short of perfection.
Stage 1: The Meringue – Heating and Cooling to Perfection
The journey to perfect Swiss Meringue Buttercream begins with its namesake: the Swiss meringue. This foundational element is created by gently heating egg whites and sugar, a process that serves multiple critical functions.
The Double Boiler Dance: Egg Whites and Sugar
Heating egg whites and sugar over a double boiler is paramount. This step isn't just about dissolving the sugar; it also gently cooks the egg whites, making them safe for consumption and strengthening their protein structure for a stable meringue. The goal here is gentle, even heat distribution, and precision is key.
- Barely Simmering Water: Your saucepan should contain just enough water to create a gentle simmer, and crucially, the bottom of the mixing bowl (containing your egg whites and sugar) must not touch the water. If the bowl makes direct contact or the water boils too vigorously, you risk scrambling the egg whites – turning your potential meringue into a sweet, clumpy breakfast rather than a smooth base.
- Whisk Constantly: As the mixture heats, whisk constantly to prevent the egg whites from cooking too quickly on the sides and bottom of the bowl. This ensures even heating and a uniform dissolution of sugar crystals.
- The Magic Number: 140°F (60°C): Aim for a temperature of 140°F (60°C). This temperature is scientifically proven to safely pasteurize the egg whites, making them safe to eat without further cooking. It also ensures all sugar crystals are completely dissolved, leading to a smooth, stable meringue. You'll know the sugar is dissolved when you rub a small amount of the mixture between your fingers, and it feels completely smooth, with no grittiness.
Cooling Down: The Crucial Beat
Once your egg white and sugar mixture reaches the ideal temperature and the sugar is dissolved, remove it from the double boiler. Wipe down the bottom of the bowl thoroughly to prevent any residual water from contaminating your meringue as you transfer it to your stand mixer.
Now, the meringue takes center stage, and another critical temperature phase begins: cooling. While whipping, the meringue needs to cool down completely. This process builds the structure and volume of your meringue, transforming the warm, thin syrup into a thick, glossy, stiff-peaked cloud.
- Whip Until Cool: After whipping on medium speed until the mixture looks white and thick, increase the speed to high and continue whipping for 5-10 minutes until stiff peaks form. However, don't stop there. Ron Ben-Israel, a renowned pastry chef, advises continuing to beat on low speed for an additional 15 minutes until the bowl feels cool to the touch. This step is non-negotiable. If you add butter to a warm meringue, the heat will instantly melt the butter, resulting in a soupy, unstable mess that simply won't emulsify. The cool meringue acts as the perfect canvas for emulsifying the butter.
- Stiff, Glossy Peaks: The meringue should be thick, glossy, and hold stiff peaks when the whisk is lifted. The bowl should feel completely cool, indicating that the meringue is at the optimal temperature for the next step.
Stage 2: The Butter – Room Temperature is Your Best Friend
Once your meringue is perfectly cool and stiff, it's time for the star ingredient of any buttercream: butter. However, the temperature of your butter is perhaps the most critical factor for achieving that signature silky Swiss Meringue Buttercream texture.
The Goldilocks Principle for Butter
Forget "softened" butter as you might use for cookies. For SMB, you need butter that's *just right* – neither too cold nor too warm. This is often referred to as "cool but soft" or ideal room temperature butter.
- What "Room Temperature" Really Means: Your butter should be pliable to the touch, easily leaving an indent when pressed with your finger, but it should still feel cool, not greasy or shiny. It should not look melted or oily. Typically, this means butter around 65-68°F (18-20°C).
- The Perils of Cold Butter: If your butter is too cold, it won't properly emulsify with the meringue. Instead, you'll end up with a chunky, curdled-looking mixture that refuses to come together. The cold butter solidifies the fats in the meringue, breaking the emulsion.
- The Dangers of Warm/Melting Butter: Conversely, if your butter is too warm, soft, or even slightly melted, it will instantly liquefy your perfectly stable meringue, leaving you with a greasy, soupy, broken buttercream that lacks structure and body. The fat will separate, and no amount of whipping will bring it back to a smooth consistency without intervention.
Tips for Achieving Perfect Room Temperature Butter:
- Plan Ahead: Remove your butter from the fridge at least 30 minutes to an hour before you start, depending on your kitchen's ambient temperature. In a warm kitchen, 30 minutes might be enough; in a cold kitchen, you might need 1-2 hours.
- The Slice Test: Slice your butter into tablespoon-sized pieces. This increases the surface area, allowing it to come to room temperature more quickly and evenly.
- Controlled Warming: If you're short on time, try placing the wrapped butter near a slightly warm stove or even briefly in a microwave for just a few seconds (5-10 seconds maximum), flipping halfway. Be extremely cautious, as even a few seconds too long can melt it. A warm water bath (with the butter still wrapped and no water touching it) can also work.
Incorporating Butter: Patience is Key
Once your butter is perfectly tempered, the incorporation process is relatively straightforward but still requires attention. Add the butter one tablespoon at a time to your cool meringue, beating well after each addition until it's fully incorporated before adding the next. This slow, steady addition allows the butterfat to gradually emulsify with the meringue, building the buttercream's smooth, stable structure. Don't be alarmed if the mixture looks "curdled" or "soupy" at first – this is completely normal! Continue beating, and eventually, it will miraculously come together into that recognizable, silky Swiss Meringue Buttercream.
Beyond the Basics: Flavorings and Additions (Temperature Considerations)
Once you have your base Swiss Meringue Buttercream, the fun truly begins with flavorings. However, even here, temperature plays a vital role in maintaining the integrity of your SMB.
Infusing Flavors: The Balsamic Caramel Example
When adding any liquid or semi-liquid flavoring, such as a fruit puree, melted chocolate, or a rich caramel sauce, the golden rule remains: it must be at room temperature. Let's consider a delicious example: Balsamic Caramel Swiss Meringue Buttercream.
Making a balsamic caramel sauce involves specific temperature steps:
- Caramel Creation: Start by simmering balsamic vinegar and brown sugar until thickened, then adding heavy cream, butter, and salt. This process creates a rich, complex sauce.
- Crucial Cooling: After cooking, the balsamic caramel sauce must cool down completely to room temperature. Just like the butter, if the caramel is too hot, it will melt your buttercream. If it's too cold and solidified from the fridge, it will seize the buttercream, creating lumps and an uneven texture. The ideal state is a pourable, room-temperature sauce.
This principle extends to all other flavorings. Melted chocolate should be cooled to just above room temperature (lukewarm), not hot. Fruit purees should be chilled to room temperature. Extracts like vanilla or almond are fine as they are. Adding anything that significantly alters the overall temperature of the buttercream can break its delicate emulsion.
Troubleshooting Common Temperature-Related Issues
Even with the best intentions, things can go awry. Here’s how to troubleshoot common temperature-related SMB dilemmas:
- Soupy/Liquid Buttercream: This is almost always due to the meringue being too warm when butter was added, or the butter itself was too warm/soft.
- Solution: Place the entire mixer bowl (or a portion of the buttercream) in the refrigerator for 10-20 minutes, then return it to the mixer and beat on medium-high speed. The chill will solidify the butter, allowing it to re-emulsify with the meringue.
- Curdled/Chunky Buttercream: This often means your butter was too cold. The cold butter solidifies in the meringue, creating a lumpy, broken texture.
- Solution: A gentle warm-up is needed. You can take a small amount of the buttercream (about a cup) and microwave it for 10-15 seconds until it's slightly melted, then return it to the main bowl and beat on medium-high. Alternatively, you can warm the bottom of the mixer bowl with a kitchen torch on low heat, moving it constantly, or set the bowl over a pan of barely simmering water for 30 seconds (don't let it touch, just warm the bowl) then beat again.
- Greasy Buttercream: This can happen if the butter was too warm to begin with or if the buttercream was over-beaten, causing the fats to separate.
- Solution: Often, chilling the buttercream for a short period (15-30 minutes) and then re-whipping it can help bring it back together.
Mastering Swiss Meringue Buttercream is a journey that rewards precision and patience, especially when it comes to temperature. By understanding and controlling the heat at each stage – from the gentle warming of the egg whites to the crucial cool-down of the meringue and the meticulous tempering of your butter – you unlock the secret to consistently creating that coveted silky, stable, and utterly delicious frosting. So, grab your thermometer, trust the process, and prepare to elevate your baking to new, perfectly temperature-controlled heights!
